
If you want to connect speakers to amplifiers without difficulty, either read on or contact a pro. You can quickly set those speakers up.
For a PA or entertainment system, setting up amplifiers and speakers can be challenging. Incorrect use can harm the speakers, the amplifier, or both.
When looking up how to connect speakers to an amplifier, someone who is unfamiliar with sound system setup may find it easy to become confused by all the different cables, connectors, and ideas that are involved.
Naturally, if you find yourself completely stumped, you can seek professional assistance. Read on to find out everything you need to know about safe and effective speaker-amplifier connections before you go.
Also read: What Are Active Speakers? Speakers Can Be Active Or Passive
Table of Contents
Concepts You Need to Know Before Connecting Speakers to An Amplifier
More than just physically connecting cables between them is involved in setting up speakers and amplifiers. Before making the connection, preparation is involved.
For instance, you must match the wattage and impedance of the amplifier and the speakers when selecting a suitable amplifier for your speakers.
Don’t worry if these ideas are unfamiliar to you; we will explain everything you need to know in an understandable manner here. To better comprehend the hows and whys of connecting your amplifier to speakers, you must learn a few specifics.
Determining the Power Handling Capability of the Loudspeakers
Power rating, also known as wattage, is one of the specifications you must take into account when dealing with speakers. On a label affixed to the magnet, you’ll find the power rating specification, which is specified in watts. Examples include 1000W, 800W Peak, 350 RMS, and others.
The total continuous power that the coil inside the magnet can dissipate without burning out is known as the speaker’s power rating or wattage.
You must be careful because some manufacturers trick consumers into believing that the number printed on the label refers to the continuous power the speaker can handle by using the peak power that the speaker can handle for only a brief period of time as an advertisement hook. In order to determine the actual power the speaker can handle continuously without being damaged, you must look for the continuous, or root mean square (RMS), value.
Voltage, current, and resistance or impedance are typically related to power ratings. I’ve written a piece that goes into more detail about speaker wattage and power handling if you’re interested in learning more. To find out more, click the link.
Determining the Impedance of the Loudspeakers
Before moving on, let’s define impedance as it applies to speakers and amplifiers. Impedance, to put it as simply as possible, is the resistance the speaker presents to the amplifier. Ohms and the Ω sign stand for impedance.
Make sure that the impedances match when connecting a loudspeaker to an amplifier to avoid issues like the amplifier overheating or damaged speaker coils.
More power will be delivered from the amplifier if the speaker impedance is lower. A speaker with a higher impedance, however, will require less power to drive it from the amplifier.
Consider two speakers, one of which is 4&Omega and the other is 8&Omega, as an example using numbers. When using the same amplifier, the current drawn by the 4Ω speaker will be greater than that of the 8Ω speaker. It follows that the 4&Omega will use more energy than the 8&Omega.
Because of this, the specifications of an amplifier will list information like Watts @ 8 ohms: 450W, Watts @ 4 ohms: 650W, and Watts @ 2 ohms: 1200W. The power draw increases as the speaker’s impedance decrease, as can be seen.
Matching the Speaker’s Input and Amplifier’s Output Power
Assuming that the loudspeaker’s wattage must be higher than the amplifier’s power output is a common error people make when matching the speaker’s power handling and the amplifier’s power output. There is no way that this is true.
Amplification devices require sufficient headroom in order to function properly. By “headroom,” I mean that it should only operate at 80% of its maximum power delivery capacity.
The reason is that an amplifier will clip when it is overdriven past its limit, and during a clip, some waveform components behave as if they were a DC power source, which is easily damaging to a loudspeaker’s coils.
A good rule of thumb is to select an amplifier that offers at least the same amount of power as the RMS or continuous (program) power that the speaker can handle. It is preferable to select an amplifier with twice the RMS or continuous power because you will have more headroom to stay out of clipping territory.
TIP: Please remember that you can also connect a speaker with low power handling to an amplifier with higher output as long as you keep the output power from the amp controlled to a point where it delivers a maximum of twice the RMS or continuous power of what the speaker can handle.
Everything you need to know about matching the appropriate amplifier to the speaker’s wattage and impedance is covered in more detail in an article I’ve written. Check it out by clicking the link.
Handy Chart for Recommended Amplifier Power for Speakers
| SPEAKER RMS POWER RATING | MINIMUM RECOMMENDED AMPLIFIER POWER (RMS) | IDEAL RECOMMENDED AMPLIFIER POWER (RMS) |
|---|---|---|
| 50 Watts | 50 Watts | 100 Watts |
| 100 Watts | 100 Watts | 200 Watts |
| 200 Watts | 200 Watts | 400 Watts |
| 300 Watts | 300 Watts | 600 Watts |
| 500 Watts | 500 Watts | 1000 Watts |
| 1000 Watts | 1000 Watts | 2000 Watts |
Power the Amplifier Will Deliver into the Loudspeaker – Based on the Speaker’s Impedance
As was already mentioned, the proper operation of the audio system depends on the speakers’ and amplifiers’ impedances being matched.
To produce the same sound pressure level (SPL), the amplifier will either output more power or less power, depending on the impedance of the speakers.
In case you didn’t know, the method used to gauge a speaker’s volume is called Sound Pressure Level (SPL).
Because of this, it is never a good idea to estimate a sound system’s volume based on the power a speaker or amplifier can handle. Another matter altogether is loudness.
Simply put, lower impedance speakers are more difficult to drive and use more power because an amplifier connected to a low impedance speaker (4 Ohms or 2 Ohms) needs to output a higher current.
The same amplifier produces less current to drive a speaker with a higher impedance (8 or 16 Ohms).
Therefore, you want your impedance numbers to be as close to the same as possible when sending a signal from the amplifier to the speaker.
When connecting speakers to an amplifier, the impedance of the amplifier should be the same as the sum of the impedances of the speaker elements for optimal power transfer.
To fully understand the limitations of your system, it is always a good idea to check the manufacturer specifications for both the speaker and the amp.
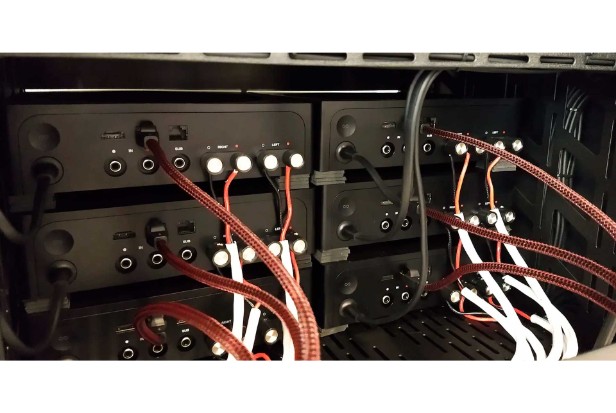
Speaker Terminals
You will be better able to understand how to connect a speaker to an amplifier if you understand the fundamentals of speaker terminals. These terminals are used to connect the amplifier to the speakers. Speaker wires are used to transmit audio signals to the speakers. These terminals are always sold in pairs, one positive and one negative. Additionally, it is color-coded in red and either black or white. Black or white are still for the negative, and red is still for the positive.
Read more: What Are Speaker Tweeters? How Do They Work
Speaker Wires
The speaker is linked to the receiver or amplifier by the speaker wires. The majority of brands include speaker wires with proprietary sockets that you have to insert into the amplifier and a stripped wire on the other end that you have to insert into the speaker. The majority of speaker wires are color-coded to prevent confusion, but it can be challenging to insert the part into the speakers. For the positive and negative, speaker wires have two wires each. Typically, a marker designates which wire is the positive one. A single stripe or dashed lines may appear occasionally. When the wire is translucent, it occasionally also has printed labels.
You would need to strip it first to expose the strands before inserting the speaker wires. Then, tightly twist the strands to form a single wire that will remain connected.
There are also speaker wires with various connectors for simple speaker connection. Spring clip terminals are connected with pin connectors, whereas binding post terminals are connected with banana plugs and spade connectors. These connectors are available separately and can be installed on bare speaker wires to assist with setup.
Steps for Connecting Speakers to An Amplifier
You can now understand the steps for connecting a speaker to an amplifier because you have a better understanding of the fundamentals of speaker terminals and wires. To prevent electrocution, make sure to unplug the amplifier before configuring it.
- Speaker wires should be connected at the speaker end closest to the amplifier’s back. Never forget to check the terminal to see if it is positive or negative. If the terminal is a spring clip, you must push it down before you can insert the wire. Select the appropriate terminal if it makes use of a proprietary socket.
- Speaker and wire must be connected. Before inserting the wire if the terminal is a spring clip, push it down. Before inserting the wire into the post if the terminal is a binding post, loosen the screw. Negative and positive wires should be inspected at the terminal. The wrong wire placement will cause audio problems like thin bass or a scratching sound.
- You can now enjoy your speakers if the speaker and amplifier are connected properly by plugging the amplifier into a power source.
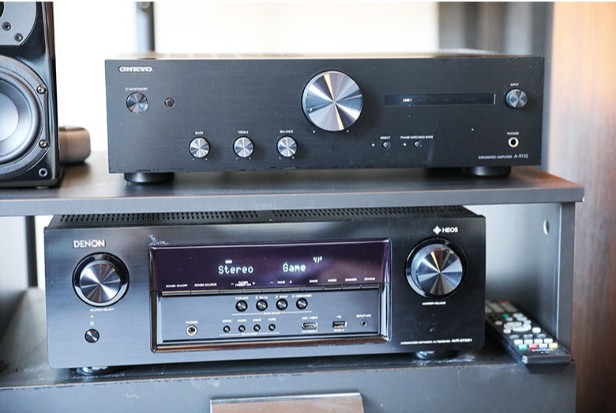
How to Set Up Amplifier and Speakers’ Cables for Home Systems
Most home audio systems come with everything you need to complete the installation. In the unlikely event that they don’t, you’ll need speaker wires to connect the speaker and amplifier.
The majority of brands connect the amp and speaker using common plugs or connectors. Exclusive connectors are sometimes used on the amp and speaker side by premium manufacturers like Bose.
Most speaker wires have colors for quick and simple setup. Positive is represented by red, while negative by black. The positive wire may occasionally have a single stripe, a dashed line marker, or a printed label.
Strip the wires to reveal the copper strands before putting them into your speaker. Then, tightly twist the strands one by one until none remain. Before connecting the wire to the speaker or amplifier, you must make sure all strands have fused together into a single wire.
You don’t want a strand to short between the positive and negative because that could harm your amplifier.
There is no need for a special shield on the cables because the signal from the amplifier to the speaker is still weak and cannot be tapped. Different wire cable gauges are an option, though.
You should take into consideration a heavier gauge as the cable’s capacity and length increase. This typically ranges from 10 to 14 gauge.
Some speaker wires have unique connectors for quick connection to your speakers. The following are the types of connectors available:
- Spade connectors (Mostly used insede the speaker cabinet)
- Pin connector
- Banana plugs
- Push Connectors
Binding post terminals and banana plugs are connected to speakers using spade connectors, while spring clip terminals are connected to speakers using pin connectors. These connectors can be purchased separately and installed on bare speaker wires.
Speaker Wires/Cables for Live Music, Live Sound, and Audio Recording
Usually, PA systems will use Speakon connectors or ¼” Jacks to attach amplifiers to speakers The portability of PA systems is to blame for this. Connecting with stripped wires is illogical.
This frequently makes connections as easy as plugging the L channel into the left front-of-house speaker, the R Aux into the right foldback, etc.
Check the type of connection your speakers have before you purchase an amplifier. Although adapters and mixed connection cables are always an option, having matched inputs and outputs is more practical.
These kinds of connections or RCA leads may be used by your home system if you’re lucky to make life simpler.
Connecting Multiple Speakers to An Amplifier
There is a limit to how many speakers your amplifier will accept as plug-ins. A few things need to be taken into account first.
Calculate the Combined Impedance of the Loudspeakers You Want to Connect.
Bear in mind that different amplifier channel combinations exist. They can have:
- A single mono channel
- Two channels, known as stereo
- Even more channels (the output of each of the extra channels could also be mono or stereo themselves)
You must take into account each channel when calculating speaker impedance. In the end, a stereo amplifier’s left and right channels become independent.
As you will discover below, calculating the total resistance in an electrical circuit is similar to calculating the total impedance of speakers.
Series Connection
The impedance of each speaker must be added if you connect your speakers in series. The sum is the total impedance.
For instance, if you have two speakers with an impedance of 4 ohms each, your total impedance is 8 ohms. If you have an amplifier with an output impedance of 8 ohms, the speakers would function properly.
Parallel Connection
The calculation for impedance differs in parallel. As you continue to add speakers to the circuit, the overall impedance decreases.
The total impedance would be 2Ω as opposed to 8Ω if we reconnected the speakers from the previous example in parallel. Because the impedance may be too low for the amp in this situation, you should be extra cautious when connecting speakers in parallel.
Make sure the total speaker impedance is higher than the amplifier’s output impedance when connecting speakers to an amplifier. Although it can be a little higher, you won’t be able to achieve your ideal volume.
Reference Chart for Parallel Speaker Impedance Matching
| NUMBER OF SPEAKERS CONNECTED IN PARALLEL | RATED IMPEDANCE OF EACH SPEAKER | TOTAL IMPEDANCE AS SEEN BY THE AMPLIFIER |
|---|---|---|
| 2 | 4 Ohms | 2 Ohms |
| 2 | 8 Ohms | 4 Ohms |
| 2 | 16 Ohms | 8 Ohms |
| 3 | 4 Ohms | 1.33 Ohms |
| 3 | 8 Ohms | 2.67 Ohms |
| 3 | 16 Ohms | 5.33 Ohms |
| 4 | 4 Ohms | 1 Ohm |
| 4 | 8 Ohms | 2 Ohms |
| 4 | 16 Ohms | 4 Ohms |
Operating Modes of Power Amplifiers – Stereo, Parallel, Bridge Mono
Power amplifiers can connect to speakers in three different ways. They are bridged, parallel, and stereo modes. Examine them more closely now.
Stereo Operation
Most contemporary amplifiers are stereo, which means that the left and right channels are each powered separately. Consider each amp channel to be its own amp, which is then packaged together to form one amp.
Due to the fact that the two channels can operate independently of one another, depending on the amplifier, you may be able to run a variety of loudspeaker setups with various output impedances at the same time.
The signal from the mixer or speaker management system can be connected to the stereo amplifier’s two back inputs using these connectors. They are usually labeled “Channel 1, ” “Channel 2,” or “Left” and “Right.”
Afterwards, each output of the amplifier is connected to two speakers (left and right) facing the audience or, if using the AUX channel, to monitors on stage.
The sound engineer can design a distinctive stereo sound because the mixer frequently permits separate mixes for the L and R channels.
Parallel Operation
The same signal is fed through both the L and R channels during parallel operation. You essentially feed a mono signal to both channels when using an amp in parallel mode.
When connecting a mono signal mixer to a stereo amplifier, for example, you would use an amplifier in parallel mode. Mono signal mixers have only one output.
In such a case, you would use a “Y” splitter cable to receive the mono signal from the mixer and split it into two to send the same signal to both channels on the amp.
Bridged Mono Operation
Bridged mono mode in amplifiers aims to increase power by combining a two-channel amp into a single unit. Subwoofers typically use this configuration to power them because they need a lot of power to operate, especially when using large 18″ subs.
By dividing the input signal into two identical signals, bridged amplifiers operate. One of the split signals is then taken and its polarity is reversed by internal circuitry. The inverted signal is then fed to the other channel amp, while the original signal is fed to one channel amp.
When attaching a speaker to a bridged amplifier, the cables are crossed over the two positive leads. Due to this, before attempting to connect anything, make sure to activate the dip switches on the amplifier’s back to put it in bridged mode.
Since amps differ, you might need to consult your manual for a complete list of your amp’s specifications.
Daisy-Chaining Power Amplifiers
Imagine you want to link a mixing desk to four different amplifiers. In other words, you want to daisy chain several amplifiers using the mixer’s audio signal. Why would you do that?
You can accomplish this in two different ways. To connect to each amplifier using the first method, use a different mixer output. The second technique involves daisy-chaining the amplifiers themselves using their buffered, unused input connectors.
Some mixers have two main outputs, one with an XLR connector and the other with a TRS connector. You could connect to one amplifier using the XLR outputs and the other using the TRS.
The kind of amplifier you have will determine how limited this method is. This is the only approach you have if your amplifier only has one input per channel and doesn’t provide buffered additional inputs.
The second strategy involves daisy-chaining the amps individually. Most contemporary amplifiers have XLR inputs in addition to TRS and, in some cases, even RCA inputs, as can be seen if you look at the input for each channel in the back.
Internally, a buffer circuit is used to connect each of these. Additionally, the unused inputs can serve as outputs for the following amplifier. To connect, you’ll need an XLR to TRS adapter cable.
After that, daisy-chain the next amplifier using the XLR male and any remaining inputs on the first amplifier channel. Continue doing this until all of the necessary amplifiers have been daisy-chained.
These inputs are buffered, so you don’t need to be concerned about impedance mismatches.
Setting the Correct Gain Control Or Input Sensitivity on Amplifiers
You can be sure that your speakers will produce high-quality audio if the gain on your amplifier is set properly. The gain control regulates how much more volume must be added to the source for the amplifier to operate at maximum efficiency.
Finding the ideal balance for your speaker is the key. You will introduce distortion into the sound if you set the gain too high. However, if you set it too low, you’ll be defeating the amp’s original intent.
Despite the fact that manufacturers produce amplifiers with various designs and provide detailed operating instructions, a universal approach is effective with all amplifiers.
Here is what you need to do to set the correct gain control or input sensitivity on an amplifier:
- In order to start, completely reduce the amp’s gain.
- The loudest section of the song or performance should be played after you input some audio.
- Then raise the gain (volume) until the amplifier begins clipping or distorting the signal, which you can see by watching it.
- In order to hear the loudest part of the performance or track you want, turn down the volume until the distortion is gone.
Now, all audio signals must be audible. The system ought to be more understanding when a drummer gives a few extra hard hits or when a novice singer doesn’t back off the mic far enough for big notes.
Summary: Connect Speakers to An Amplifier
It may seem like a difficult task to complete to set up a speaker and amplifier system. Now that you know how to do it, you can connect a speaker to an amplifier on your own! Even without a pro’s assistance, you can still enjoy your speakers.